How to Arrange Furniture in a Studio Apartment
Before you even think about dragging a sofa across the room, let’s get one thing straight: the secret to a great studio layout isn’t about having the perfect furniture. It’s about having the perfect plan. The whole process really boils down to three key things: measuring your space obsessively, mapping out a floor plan to create different “zones,” and choosing smart, multifunctional pieces that work twice as hard.
Get this blueprint right, and you’ll turn a single, boxy room into a home that feels organized, intentional, and surprisingly spacious.
Your Studio Layout Blueprint
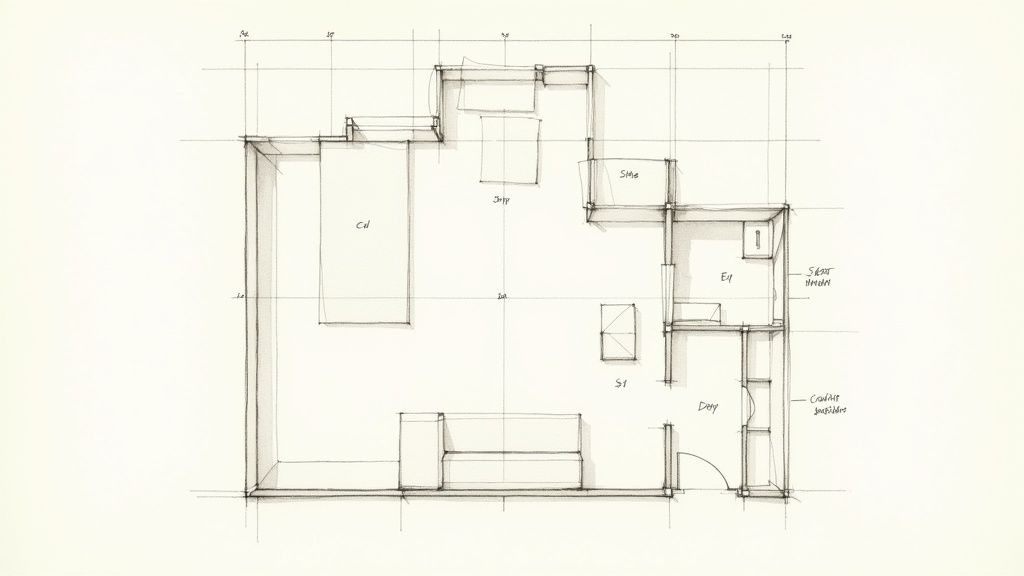
We can’t stress this enough: your first move should always be creating a detailed floor plan. This isn’t some complex architectural drawing. Think of it as a simple map that stops you from making the number one mistake in small-space design—buying beautiful furniture that completely eats up the room. Your blueprint is your guide for everything that comes next.
This isn’t just about avoiding the headache of shuffling heavy furniture around. A solid plan helps you actually see the traffic flow, pinpoint awkward corners, and squeeze the most out of every single square inch. It’s the difference between a studio that feels chaotic and one that feels like a real, organized home.
Measure Everything Twice
Grab a tape measure and get ready to document everything. And we mean everything. Don’t just get the basic length and width of the room. You need the nitty-gritty details.
- Vertical Height: Know your ceiling height. This is crucial for tall pieces like bookcases or wardrobe systems that can offer massive storage.
- Windows and Doors: Measure their width, height, and exact location. Don’t forget to account for the space they need to swing open fully!
- Obstructions: Make a note of every radiator, outlet, light switch, and weird architectural quirk. A pillar or a built-in shelf can change your entire plan.
These details are what make or break a layout. That perfect spot you eyed for the bed? It’s totally useless if it blocks the only convenient power outlet for your phone charger. Getting precise measurements gives you a realistic picture of the actual usable space you have to play with. You can even compare your numbers against standard furniture sizing charts to get a feel for how different pieces might fit.
Here’s a quick checklist to make sure you don’t miss anything important. Jotting these down before you start sketching will save you a world of trouble later.
Essential Studio Measurement Checklist
| Measurement Area | What to Measure | Pro Tip |
|---|---|---|
| Overall Space | Total length and width of the main room. | Measure from wall to wall, not just baseboard to baseboard, for the most accurate dimensions. |
| Ceiling Height | Floor to ceiling. | Essential for vertical storage solutions like tall bookshelves or loft beds. |
| Windows | Width, height, and distance from the floor/corners. | Note which way they open (inward, outward, slide) to avoid blocking them with furniture. |
| Doors & Entryways | Width, height, and swing direction/clearance. | Make sure you have at least 3 feet of clear walkway at the main entrance. |
| Architectural Features | Location and size of pillars, nooks, or alcoves. | These “quirks” can become perfect anchors for defining different zones. |
| Permanent Fixtures | Location and dimensions of radiators, heaters, and AC units. | Leave adequate clearance around these for airflow and safety—at least 6-12 inches. |
| Outlets & Switches | Precise location of all electrical outlets, light switches, and cable hookups. | Mark these on your plan so you don’t accidentally block a critical power source. |
Once you’ve got these numbers, you’re ready to bring your space to life on paper (or screen).
From Paper to Pixels
With your measurements in hand, it’s time to start sketching. You can go old-school with graph paper, letting each little square represent a unit of measurement, like 6 inches. For a lot of people, this hands-on approach is the best way to really get a feel for the scale of the room and how furniture will fit.
If you’re more digitally inclined, there are tons of user-friendly apps and online tools that let you build a floor plan. Most come with libraries of furniture templates you can just drag and drop into your layout. This makes it incredibly easy to experiment with different arrangements without breaking a sweat. To really hone your vision, it’s a great idea to pull all your ideas together by creating an interior design concept sheet before you commit to a final placement.
Key Takeaway: Your floor plan is your most powerful tool. It transforms the abstract challenge of “how to arrange furniture in a studio apartment” into a concrete, solvable puzzle, ensuring every piece you choose has a purpose and a place.
This planning phase is more important now than ever. With more people moving into cities, the demand for compact living solutions is booming. The global market for multifunctional furniture was valued at a massive USD 7.21 billion in 2023 and is only expected to keep growing. It’s all part of a bigger shift toward making smaller, smarter homes work better for us.
Creating Smart Zones in Your Studio
The single biggest mental shift you can make when planning your layout is to stop seeing your studio as one big room. Instead, think of it as several distinct “rooms” that just happen to share the same four walls. Creating these smart zones is the secret to making your space feel intentional and organized, not like a chaotic jumble of furniture.
It’s all about assigning a specific purpose to each area: a place to sleep, a spot to relax, a corner to eat, and maybe an area to work. This psychological separation helps you maintain order and makes the entire apartment feel much larger and more functional. The goal is to build visual cues that tell your brain, “this is the living room,” even when your bed is only ten feet away.
Prioritize Your Zones Based on Your Lifestyle
Before you start creating invisible walls, get honest about how you actually live. Do you work from home five days a week? If so, your work zone might need prime real estate near a window for natural light. Are you a passionate home cook? Then your dining or kitchen prep area takes precedence.
Think about these common scenarios:
- The Remote Worker: A dedicated workspace is non-negotiable. You’ll need to prioritize a comfortable desk and chair setup, maybe tucked into a corner or separated by a screen.
- The Entertainer: Your living area is the star of the show. You’ll want to maximize seating and create a welcoming, open feel for when guests drop by.
- The Homebody: Your main goal will be carving out a cozy and distinct sleeping sanctuary that feels like a true retreat from the rest of the space.
Your dominant lifestyle should dictate which zone gets the best spot. Don’t feel pressured to dedicate a huge amount of space to a formal dining area if you mostly eat on the sofa. Your apartment layout needs to serve you.
Use Furniture and Decor as Dividers
Once you know your priorities, you can use furniture and decor to create separation without building actual walls. This is where clever arrangement really transforms an open-plan studio.
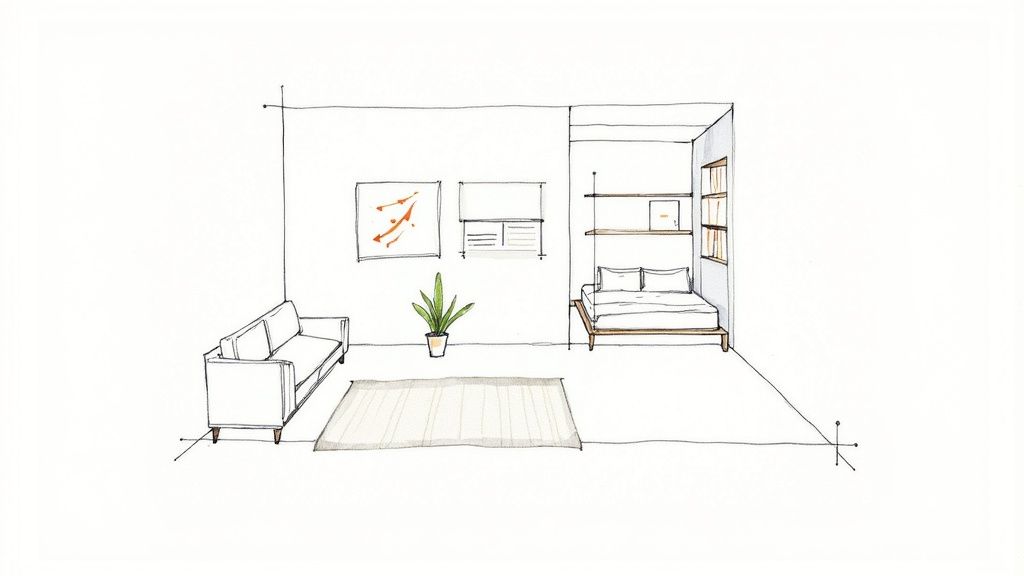
One of the most effective tools for this is a simple area rug. Placing a large rug under your sofa, coffee table, and accent chair instantly anchors the “living room” and defines its boundaries. A common mistake is choosing a rug that’s too small; you want at least the front legs of your main furniture pieces to sit comfortably on it.
A well-placed rug tells everyone that THIS is the focal point of the room. A rug that’s too small makes the area feel disjointed and can cheapen the entire look.
Another powerful technique is to use furniture itself as a divider. Try turning your sofa so its back faces your bed. This simple move creates a strong visual line separating your living and sleeping zones. Open-backed bookcases are also fantastic for this; they divide the space while still allowing light and air to pass through, keeping the room from feeling closed off. For more solid separation, you can explore a variety of physical room dividers that can be folded away when not in use.
Choosing Multifunctional Furniture That Works
In a studio, every single item needs to earn its keep. This is where you get smart and make multifunctional furniture your best friend. Ideally, each piece you bring in should serve at least two purposes, letting you reclaim precious floor space and dial down the clutter. It’s all about choosing pieces that work as hard as you do.
This isn’t just a clever design trend; it’s a direct response to modern living. The demand for space-saving solutions has absolutely skyrocketed as more people move to cities. In fact, the multifunctional furniture market hit a value of USD 15.9 billion in 2024 and shows no signs of slowing down.
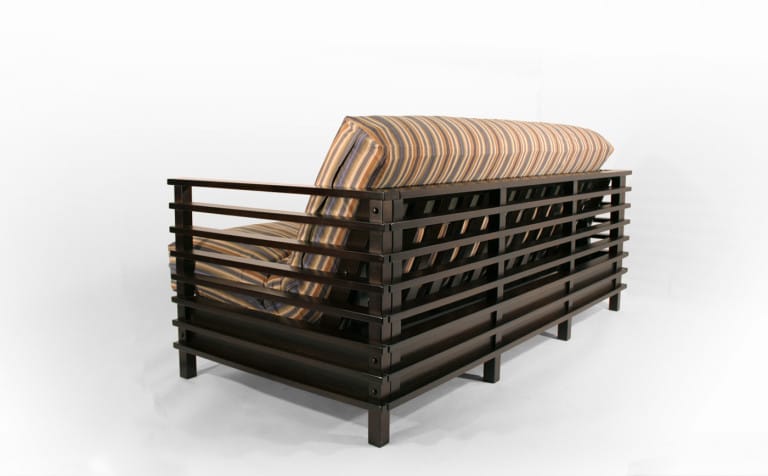
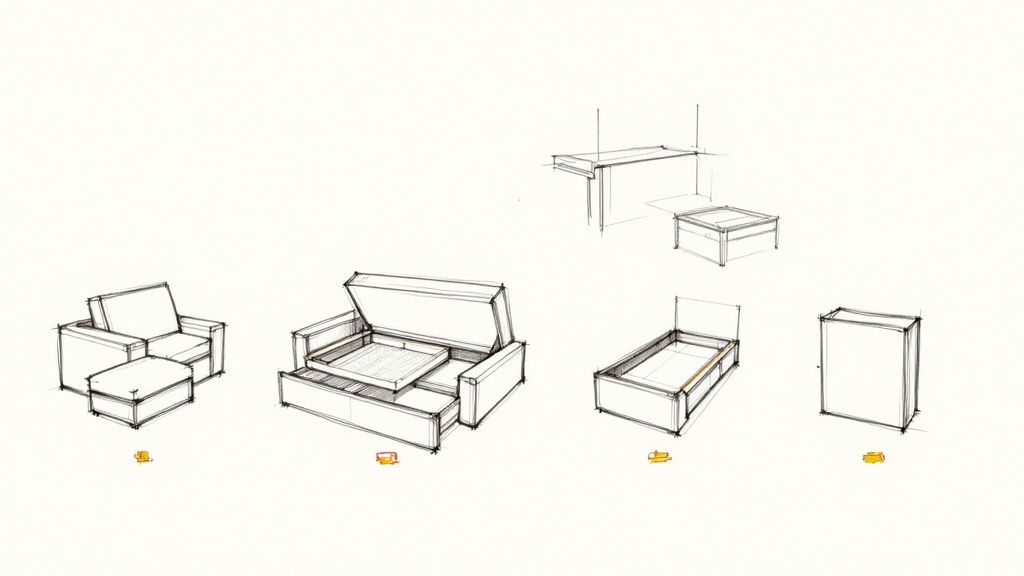
Beyond the Basic Sofa Bed
The classic sofa bed is a great start, but today’s options go so much further. Think about how a few key pieces can completely transform the way you live in your space day-to-day. A modular sofa with hidden storage, for instance, can do the job of a couch, a guest bed, and a linen closet all at once.
When you’re shopping, think about your daily routines. What do you actually do in your apartment?
- Lift-Top Coffee Tables: These are absolute game-changers. By day, it’s a standard coffee table. By night, it raises up to become a comfortable dining surface or a work desk, completely eliminating the need for a separate table.
- Storage Ottomans: Don’t underestimate these little workhorses. They’re extra seating when friends are over, a footrest for movie nights, and a sneaky place to stash blankets, magazines, or remote controls.
- Nesting Tables: Instead of one bulky end table, a set of nesting tables gives you multiple surfaces when you need them and tucks away into a tiny footprint when you don’t.
Pro Tip: Before you buy any convertible piece, test the mechanism in the store. A sofa bed that’s a nightmare to open and close will just end up staying a sofa, defeating its purpose entirely. Look for smooth, easy-to-operate designs.
Choosing the right convertible sofa can make or break your studio’s living zone. You can explore a wide variety of high-quality convertible sofa beds that are designed specifically for small-space living, focusing on both comfort and long-term durability.
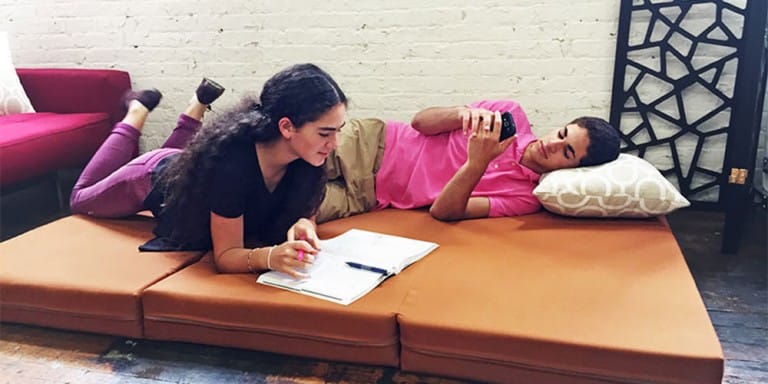
The Ultimate Space-Savers: Murphy Beds and Cabinet Beds
If you truly want to maximize your living area, nothing beats a bed that disappears during the day. This is the single biggest move you can make to transform your studio from a bedroom into a proper living room.
A Murphy bed, which folds up into a wall unit, is the undisputed champion of space-saving. When it’s closed, it can look like a stylish cabinet or even incorporate a built-in desk or shelving. For anyone who can’t modify their walls (renters, I’m looking at you), a cabinet bed is a fantastic alternative. These are freestanding pieces that fold a mattress into an elegant credenza, giving you back your entire floor plan.
Investing in these pieces is an investment in a more organized, flexible home. They allow you to host guests, work from home, and just relax without feeling like you’re constantly navigating around a giant bed. One great item can solve multiple problems, completely changing the flow and feel of your studio.
Mastering Traffic Flow and Open Sightlines
A well-arranged studio isn’t just about what’s in it; it’s about how you move through it. The best layouts feel effortless. You can walk from your entryway to the kitchen without weaving through an obstacle course. This is where mastering traffic flow becomes essential.
Think of traffic flow as the invisible pathways you take to get around your home. When you’re arranging furniture in a studio, your number one job is to protect these paths. Blocking them creates daily frustration and makes the whole space feel smaller and more chaotic than it actually is.
Carving Out Clear Pathways
The golden rule for comfortable movement is to leave enough space to walk without turning sideways. Aim for a clearance of 30 to 36 inches for your main walkways—this is the path from your front door to the main living area, for instance.
For smaller, secondary paths, like the gap between your sofa and coffee table, you can get away with a minimum of 18 inches. Anything less and it starts to feel cramped.
To see if your layout works, try a simple test. Walk through your daily routines:
- Get up from the “bed” and head to the “kitchen” for coffee.
- Walk in the front door and find a place for your keys and bag.
- Move from the sofa to the bathroom.
If you find yourself bumping into corners or squeezing past furniture, it’s a clear sign you need to rethink the arrangement. This isn’t just about convenience; it’s about making your space feel calm and intuitive.
Leveraging Sightlines and Focal Points
Just as important as physical pathways are your sightlines—the uninterrupted views across your apartment. Long, open sightlines trick the eye into perceiving more space. It’s a classic designer move for a reason.
When you first walk in, what do you see? A clear view to a window makes a room feel instantly larger and more inviting. Compare that to staring at the side of a bulky bookcase. The difference is night and day.
Key Takeaway: Protect the view from your entryway to the furthest window. This single sightline can dramatically impact how spacious your studio feels. Keep tall furniture against walls and use low-profile pieces in the middle of the room to avoid creating visual roadblocks.
Arranging your furniture to highlight a natural focal point, like a big window or a cool architectural detail, gives the room a sense of purpose. For example, by angling two chairs toward a window with a great view, you create an intentional conversation area that also draws attention to one of your apartment’s best features.
This strategy makes the layout feel deliberate and thoughtfully designed. You’re moving beyond just finding a place for everything to fit, and that’s the secret to making a small room feel grand.
Using Light and Decor to Define Your Space
Once your big furniture pieces are locked in, the real fun begins. It’s the finishing touches—lighting and decor—that turn a functional layout into a home that actually feels like you. These elements are your secret weapons for reinforcing the zones you’ve created, adding depth, mood, and making the whole studio feel connected.
Good lighting does way more than just help you see. It sculpts the room. A common mistake in studios is relying on a single overhead fixture, which can make the space feel flat and sterile. The key is to think in layers. We always recommend a three-part strategy to create a warm, inviting atmosphere.
The Three Layers of Studio Lighting
A balanced lighting plan can make even the tiniest studio feel dynamic and interesting. Each layer has a specific job, from providing overall brightness to showing off your favorite things.
- Ambient Lighting: This is your foundation—the general, all-over light for the entire studio. It could be your main ceiling fixture or a few well-placed lamps that brighten the whole space.
- Task Lighting: This is focused light for getting things done. Think a desk lamp in your work zone, an under-cabinet light in the kitchen, or a floor lamp parked next to your favorite reading chair.
- Accent Lighting: This is the jewelry for your space. It draws the eye to specific features you want to highlight, like a piece of art, a cool plant, or an interesting architectural detail. Picture a small spotlight aimed at a bookshelf or a decorative table lamp on a console.
When you combine these three, you create pockets of light and shadow that add dimension and make each zone feel intentional. To find the perfect task lighting, you can explore a range of modern floor and table lamps that are both stylish and practical.
Using Mirrors and Decor to Expand Your Space
Our absolute favorite trick for faking more space? Mirrors. A large mirror placed opposite a window will bounce natural light all over, instantly making the room feel brighter and more open. It creates an illusion of depth, basically doubling your visual square footage without taking up any actual floor space.
Textiles are also huge for tying your zones together without building walls. Settle on a cohesive color palette for your curtains, throw pillows, and bedding. This doesn’t mean everything has to be a perfect match—far from it. Just choose two or three main colors and play with different shades and textures throughout the studio. This creates a unified look while still giving each area its own subtle personality.
Key Insight: Don’t be afraid to add personal decor touches that show off who you are. These details are what make a studio feel like a real home.
Ultimately, it’s these final layers that complete the puzzle of arranging furniture in a studio apartment. They’re what transform a well-planned layout into a comfortable, personalized space you’ll love coming home to.
Common Studio Apartment Layout Questions
Even with a perfect plan sketched out, real-world questions always pop up when you start moving furniture around a studio. Let’s tackle some of the most common challenges I see people face, with clear answers to help you fine-tune your layout and create a space that actually works.
One of the biggest hurdles? The bed. It’s the largest piece of furniture you own, and it can feel like it completely takes over the room. So, where does it go?
Where Should I Place My Bed?
Honestly, the best spot for your bed depends entirely on your studio’s shape and what you’re trying to achieve. If maximum separation is your goal, the classic strategy is to place it in the corner furthest from the entryway. This instantly creates a more private, den-like sleeping nook that feels distinct from your main living area.
But what if your studio is long and narrow? In that case, putting the bed against one of the long walls can help balance the space. From there, you can use a room divider or an open bookshelf to create that crucial visual break without closing things off.
Don’t be afraid to float your bed away from the wall. We’ve seen clients place a low console table or bench behind the headboard to create a subtle division. It works wonders and gives you extra surface space without blocking sightlines.
Ultimately, you need to experiment with your floor plan. The goal is to find a placement that gives you as much usable living area as possible during the day while still offering a comfortable, designated place to crash at night.
How Can I Create a Dining Area Without a Table?
A lot of studio dwellers ditch the traditional dining table to save space, but that doesn’t mean you have to eat every meal on your lap. Multifunctional furniture is your absolute best friend here.
Consider these clever alternatives we recommend all the time:
- A Lift-Top Coffee Table: This is a fantastic solution. It transforms your living area into a dining zone in seconds and then tucks away just as fast.
- A Counter-Height Console Table: Placed against a wall or right up against the back of your sofa, a narrow console with a couple of stools takes up minimal floor space but feels like a proper dining spot.
- A Fold-Down Wall-Mounted Table: This option is the ultimate space-saver for tiny apartments. It completely disappears when you’re not using it.
Even a small kitchen island on wheels can pull double duty as a prep surface and a dining bar. The key is to find a solution that fits your habits without adding unnecessary bulk to your layout.
What’s the Best Way to Handle a TV?
Placing a TV in a studio is tricky—the last thing you want is for a giant black screen to become the focal point of your entire home. The trick is to integrate it into your layout discreetly instead of letting it dominate.
A media console that offers plenty of storage is always a smart choice, helping you hide cords and clutter. If you’re short on floor space, mounting the TV on the wall is an excellent option. I love seeing people create a gallery wall around it; the art helps it blend right in with the decor.
For maximum flexibility, think about putting your TV on a swivel mount. This lets you angle it toward your living area for movie nights or turn it toward your kitchen while you cook, making one device serve multiple zones. It’s a simple change that makes a huge difference.
At Futonland, we specialize in finding the perfect space-saving solutions for modern homes. From convertible sofas to Murphy beds that reclaim your floor space, we have the furniture that makes studio living smart, comfortable, and stylish. Explore our collection at https://futonland.com.