How To Measure A Room For Furniture So It Fits Perfectly
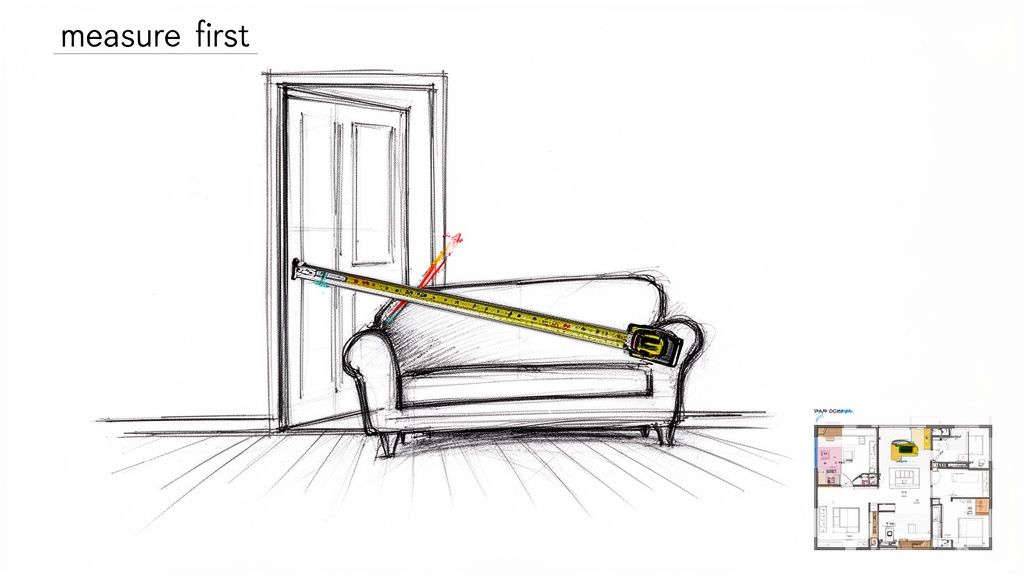
We’ve all been there—you find the perfect futon, picture it in your living room, and click “buy,” only to realize on delivery day that it won’t fit through the front door. It’s a frustrating, and often costly, nightmare.
The good news is that learning how to measure a room for furniture is simple. It all comes down to three key things: getting the room’s core dimensions, mapping out fixed obstacles like windows and outlets, and measuring the entire delivery path from the curb to the final spot. This little bit of prep work is genuinely the single most important step you can take.
Why Accurate Room Measurement Is Your First Step
Before you fall in love with a sprawling sectional sofa or a sleek Murphy bed, grabbing a tape measure is more than just a good idea—it’s a financial safeguard. It’s the difference between a smooth, exciting delivery day and a painful cycle of returns, blocked hallways, and unusable power outlets. Think of this guide as a way to reframe measurement as your best tool for maximizing every single square inch of your home.
This is more critical today than ever, as many of us are furnishing smaller homes. In the U.S., the average new home actually shrank by about 10% between 2015 and 2023. A failed delivery can easily add 10–20% to the total cost of your furniture once you factor in extra shipping, restocking fees, and taking more time off work. Planning ahead saves real money and ensures your new furniture perfectly complements your modern living space.
Your Blueprint for Success
Instead of a chore, think of this process as creating a blueprint for a room that’s both beautiful and functional. When you get the numbers right from the start, you avoid those classic pitfalls and ensure your new piece fits perfectly. We’ll walk you through everything you need:
- Gathering the right tools: Find out why a good old-fashioned metal tape measure is non-negotiable.
- Mapping your room’s dimensions: Learn how to capture wall-to-wall length, width, and ceiling height without any guesswork.
- Accounting for fixed obstacles: Plan around things you can’t move, like windows, radiators, and light switches.
- Clearing the delivery path: Make sure your furniture can get from the truck to its final destination without a single scratch.
By dedicating just 30 minutes to measuring, you can shop with total confidence, knowing exactly what will fit and where it will look best. It’s a small investment of time that prevents the massive headache of a piece that’s too big for the room or, even worse, one that never makes it past the front door.
Gathering Your Furniture Measurement Toolkit
Before you can figure out what new furniture will fit, you need the right gear. Trying to measure a room without the proper equipment is a fast track to frustrating mistakes and numbers you can’t trust. This isn’t about needing a professional contractor’s van full of supplies; it’s about a few simple items that make the process smooth and precise.
Think of this as your pre-flight checklist. Having everything ready to go means you only have to measure once. No more second-guessing your notes when you’re about to click “buy” on that perfect piece.
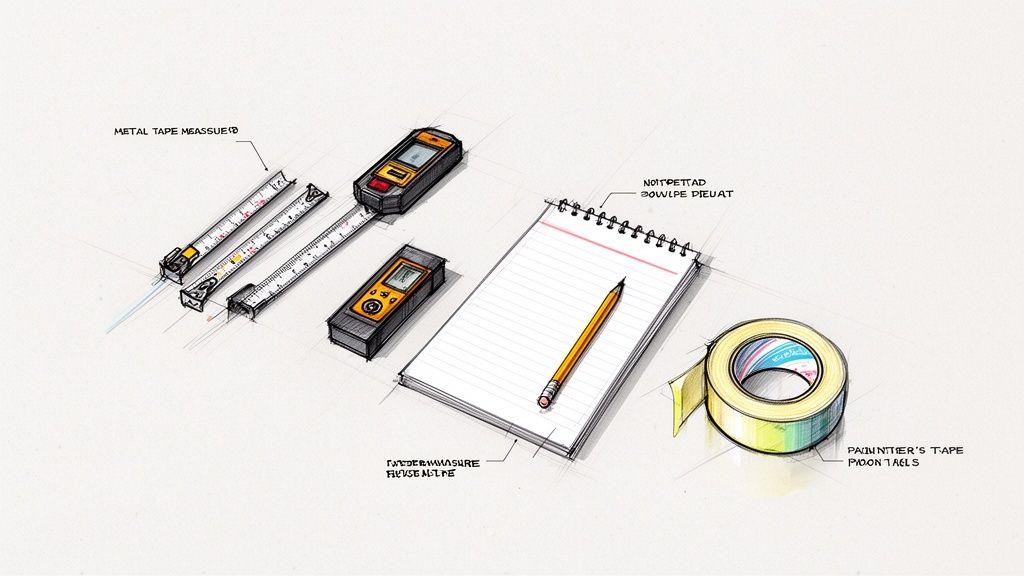
The Non-Negotiable Measuring Tools
First things first, you absolutely need a good tape measure. Your best friend here is a 25-foot metal retractable tape measure. Its stiffness lets you extend it across a room without it flopping over, and the locking mechanism is a lifesaver when you need to hold a measurement and write it down.
That soft, fabric sewing tape? Leave it in the drawer. While it’s great for tailoring, it can easily sag or stretch, throwing your measurements off just enough to cause a delivery day disaster.
If you’re dealing with a large, open-concept space or soaring ceilings, a laser measure can be a total game-changer. These little gadgets give you instant, accurate readings over long distances with just the press of a button, taking human error out of the equation.
A quick tip from experience: Even if you use a laser, it’s always a good idea to double-check a few key measurements—like a main wall or a doorway—with your metal tape. This simple cross-reference confirms your laser is calibrated correctly and gives you total peace of mind.
The Visualization Essentials
Measuring is more than just collecting numbers; it’s about seeing how those numbers will translate into a physical space. This is where the rest of your toolkit comes into play.
-
Notepad and Pencil: Sometimes the simplest tools are the most powerful. A dedicated notebook is perfect for sketching a rough floor plan of your room and jotting down every single measurement. Whatever you do, don’t rely on your memory!
-
Smartphone Camera: Your phone is perfect for snapping quick photos of tricky corners, architectural details, or obstacles like radiators and outlets. These visual cues are invaluable when you’re shopping later and trying to recall the specifics of your space.
-
Painter’s Tape: This is a designer’s secret weapon. Once you have the dimensions of a piece you’re considering, use painter’s tape to mark its footprint directly on your floor. This simple trick lets you see exactly how much space it will take up and how you’ll be able to move around it. It is also a great way to ensure your futon will not be slipping around, a common issue you can solve with the help of specialized futon non-slip grip pads.
With these simple tools in hand, you’re fully equipped to get accurate measurements. You’ve eliminated the guesswork and set yourself up for a successful and stress-free furniture shopping experience.
Mapping Your Space with Core Measurements
Alright, with your tools in hand, it’s time to get the numbers that really define your room. This isn’t just about jotting down a few dimensions; it’s about creating a functional blueprint of your space. By the end of this, you’ll have a clear map that accounts for the room’s overall size and all its permanent features, making your furniture hunt so much easier.
Think of it like putting together a puzzle. First, you have to define the edges. Once you know the exact shape you’re working with, you can figure out which pieces will actually fit inside. Let’s get those foundational measurements down.
Nailing the Room’s Core Dimensions
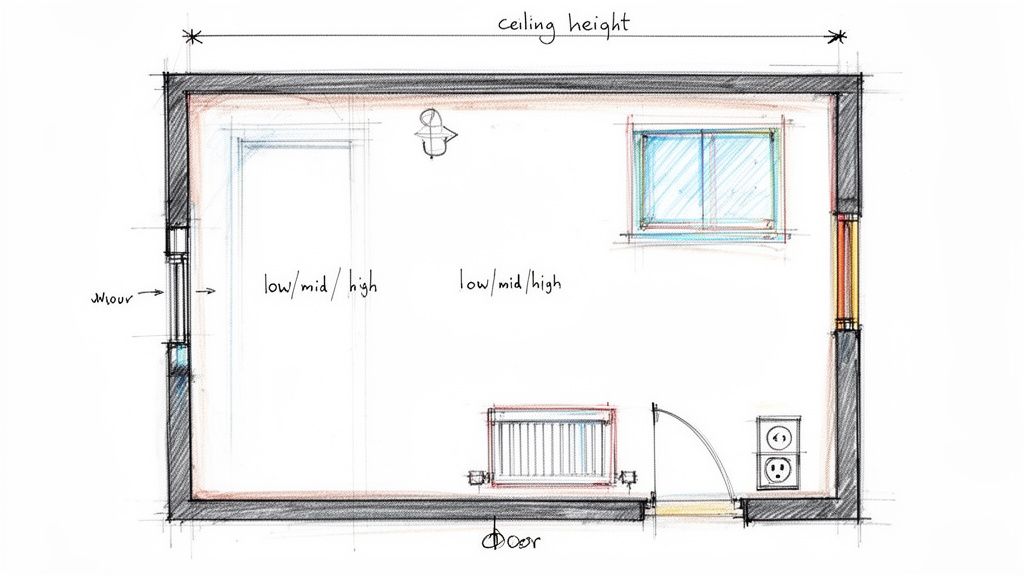
First things first: measure the main open area. This means capturing the wall-to-wall length and width, plus the ceiling height. These three numbers are the absolute foundation of your entire plan.
For the length and width, run your metal tape measure along the baseboards from one corner to the opposite one. That gives you the maximum floor space you’re working with. But don’t stop there.
Pro Tip: Measure each wall in three places—low (near the floor), middle (around waist height), and high (near the ceiling). Older homes, especially, have walls that are rarely perfectly straight. Taking three measurements helps you find the narrowest point, which is the true dimension you have to work with.
Ceiling height is another one that often gets overlooked. It’s not just for tall bookcases; it’s critical for things like Murphy beds, entertainment centers, and even just the visual balance of the room. Measure from the floor to the ceiling in a few different spots to make sure it’s consistent.
To keep track of these essential figures, here’s a quick reference table that breaks down what you need and why.
Quick Reference for Essential Room Measurements
| Measurement | What It’s For | Pro Tip |
|---|---|---|
| Wall-to-Wall Length | Establishes the longest clear dimension for furniture like sofas and media centers. | Measure at 3 different heights (low, middle, high) to find the narrowest point. |
| Wall-to-Wall Width | Defines the room’s width, crucial for traffic flow and furniture depth. | Again, measure at 3 heights to account for any bowing in the walls. |
| Ceiling Height | Determines clearance for tall items like bookcases, Murphy beds, and light fixtures. | Measure in at least 2 different spots to ensure the ceiling is level. |
| Door/Window Height | Sets the vertical constraints for furniture placed near these openings. | For windows, measure from the floor to the sill—this is key for low-profile pieces. |
| Door/Window Width | Impacts how much uninterrupted wall space you have for placement. | Always measure the opening inside the frame for the tightest dimension. |
| Obstacle Dimensions | Accounts for radiators, outlets, and vents that affect how furniture fits against a wall. | Measure the distance from the obstacle to the nearest corner and the floor. |
Having these numbers on hand before you even start shopping will save you a ton of guesswork and potential headaches down the road.
Mapping the Unmovable Obstacles
A room is almost never a perfect, empty box. It’s full of architectural quirks and fixtures you have to work around. Mapping these out is just as important as getting the wall dimensions right. This is where your sketch pad really comes into play.
Start with a rough, bird’s-eye-view sketch of your room. It doesn’t have to be a masterpiece. Now, let’s add the details that will make or break your furniture layout.
Doors and Entryways
For every door, you need more than just the opening size. You have to account for how the door actually moves in the space.
- Doorway Width and Height: Measure the opening from the inside of the door frame.
- Door Swing Clearance: Make a note of which way the door swings and how much space it needs to open fully. You don’t want your new futon to become a doorstop.
- Distance from Corner: Measure from the corner of the wall to the outer edge of the door frame. This tells you exactly how much uninterrupted wall space you have to play with.
Windows
Windows dictate light, views, and how tall your furniture can be. Sticking a tall cabinet in front of a low window just looks awkward and blocks all that great natural light.
- Window Width and Height: Be sure to include the frame in your measurements.
- Height from Floor: Measure from the floor up to the bottom of the windowsill. This is your absolute maximum height for any furniture you plan to put under it.
- Distance from Corner: Just like with the doors, measure from the wall’s corner to the window frame on each side.
I once helped a friend who bought a beautiful, low-profile futon sofa. The problem? He forgot to measure the height of his windowsill. The back of the futon was just two inches taller than the sill, completely throwing off the room’s visual flow. A simple measurement would have saved him the massive headache of a return.
Charting Fixtures and Architectural Details
Finally, it’s time to account for all the small but mighty details that can derail a perfect layout. I’m talking about the radiators, outlets, light switches, and built-ins that are permanent parts of the room.
Grab your sketch and mark the exact location of every single one. For each, measure its dimensions (width, height, depth) and its distance from the nearest corner and the floor. This level of detail feels tedious, but it’s crucial. Knowing where your outlets are prevents you from pushing a heavy media unit into a corner only to find you can’t plug in the TV. Likewise, a radiator’s location determines how far out from the wall any piece of furniture will have to sit.
A well-placed futon can be the perfect multi-functional piece, but its location has to work with what’s already there. You can explore a variety of modern and versatile futon frames designed to fit all sorts of spaces and styles.
Once you have all these elements noted on your sketch, you’ve officially created a complete and accurate map of your space. You’ve gone beyond simple dimensions and built a true-to-life blueprint. This detailed plan is your ultimate guide for what comes next, and it’s the difference between hoping a piece will fit and knowing it will.
Clearing the Path From Front Door to Final Placement
It’s an easy mistake to make. You’ve measured your living room perfectly, found a sectional that fits the space like a glove, and you’re ready for delivery. But then the delivery team arrives, and the sofa gets stuck in the hallway. This is why knowing how to measure a room for furniture also means measuring the path to the room.
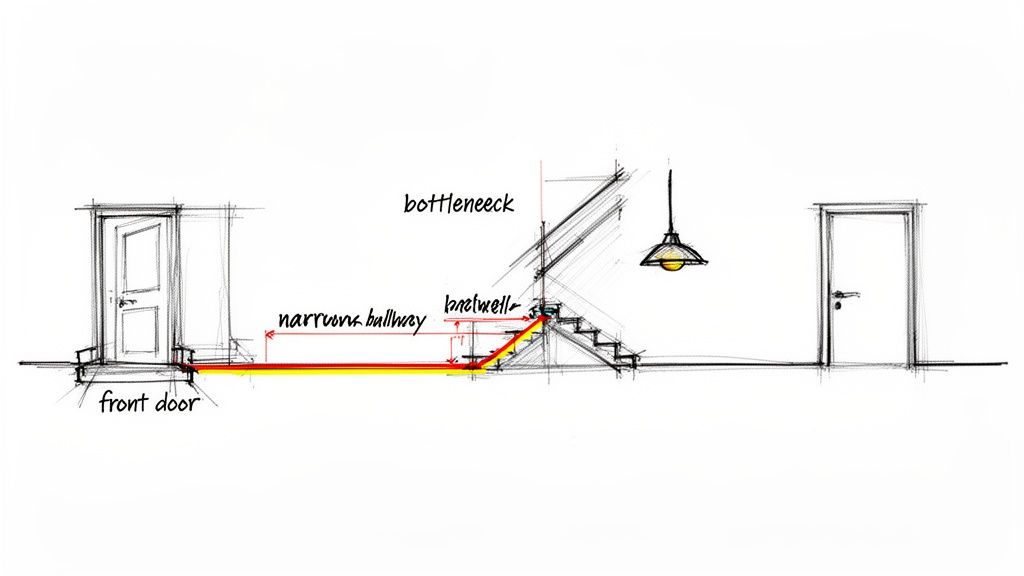
The entire delivery journey, from your front door to the furniture’s final spot, is filled with potential bottlenecks. A narrow doorway, a tight staircase corner, or a low-hanging light fixture can stop a delivery cold. Taking a few extra minutes to measure this path is just as crucial as mapping out the room itself.
Charting Every Doorway and Hallway
[Image demonstrating how to measure the diagonal width and height of a doorway for furniture delivery]
Start by walking the exact route the delivery team will take, tape measure in hand. Your goal is to find the single narrowest or lowest point, because that one measurement determines what can—and cannot—enter your home.
Measure the width and height of every single doorway along the path. For doorways, don’t just measure the opening—if the door can’t open fully or be removed from its hinges, you lose several inches of clearance. Always record the narrowest width.
Next, focus on the hallways. Measure the width of the hall at its tightest points, paying close attention to any jutting architectural features, built-in shelves, or radiators that shrink the usable space. If you’re looking for furniture designed for these kinds of challenges, many of our showrooms across NYC are set up to demonstrate how pieces navigate tight urban spaces. Exploring our New York City services can provide practical, real-world examples and delivery solutions.
The most overlooked measurement is often the diagonal height of a doorway. Many large items, like sofas or box springs, must be tilted to get through. Measure from the bottom corner of the doorway on one side to the top corner on the opposite side to find this crucial diagonal clearance.
Navigating Stairs and Elevators
Staircases are notorious furniture traps. They introduce a third dimension—the turn. If your new furniture needs to go up or down stairs, your measurement job gets a bit more complex.
- Stairwell Width: Measure the width of the stairs from the wall to the handrail (or between two handrails). This is your primary width constraint.
- Headroom Clearance: Measure the vertical distance from the front edge of a step to the ceiling directly above it. Do this at the lowest point, which is often at the top or bottom of the staircase.
- Landing Turns: If your stairs have a landing with a turn, this is a major bottleneck. Measure the width, depth, and height of the landing space. You need to ensure the furniture has enough room to pivot around the corner.
For apartment dwellers, the elevator is the first major hurdle. Measure the elevator’s interior height, width, and depth. Just as importantly, measure the height and width of the elevator door opening itself, as it’s often smaller than the interior cabin.
Finally, pull all your path measurements together. Find the single smallest width and the single lowest height from your entire list—from the building entrance, through the hallways, up the stairs, and into the room. These two numbers are your maximum delivery dimensions. Any piece of furniture you buy must be smaller than these critical measurements, no exceptions. This final check is your ultimate insurance policy against a delivery day disaster.
Visualizing Your Layout and Sizing Specific Furniture
Okay, you’ve got your room’s blueprint down on paper. This is where the magic happens—where we turn those raw numbers into a living space that actually works. We’re moving past just measuring and into the practical side of things, figuring out how each piece will feel and function day-to-day.
Before you even think about clicking “buy,” you need to see how a new piece of furniture will occupy the room. My favorite low-tech trick? Painter’s tape. Seriously. Outline the exact length and width of the sofa, futon, or cabinet bed you’re eyeing directly on your floor. It’s a simple move that gives you a real-world sense of scale that a measuring tape just can’t.
If you’re considering something bulky like a sectional, you can even cut up flattened cardboard boxes to size. This helps you feel the sheer mass of the item in the room. Live with the outline for a day or two. Walk around it. See if it blocks your natural path to the window or makes opening a closet door awkward.
Sizing Up Your Convertible Futon or Sofa Bed
Convertible furniture is a lifesaver for small spaces, but it comes with one non-negotiable rule: you have to measure for it in both its closed and open positions. So many people make the mistake of only accounting for the sofa’s footprint, completely forgetting it nearly doubles in size when it becomes a bed.
First, mark out the sofa’s dimensions with your painter’s tape. Then, grab the manufacturer’s specs for the open bed and extend that tape outline to its full length and width. This is the only way to avoid that “room-block” disaster where you can’t walk around the bed or get into your dresser.
This is also where you need to think about traffic flow. As a rule of thumb, designers aim for at least 30–36 inches of walking space in main pathways and about 18 inches between a coffee table and sofa. A queen sleeper can be 60 inches wide plus the frame, which can eat up that clearance fast. Forgetting this step is how you end up with less than a foot of space to shimmy around the bed in a tight New York studio.
Planning for a Sectional Sleeper
Sectionals—especially ones with sleeper components or storage chaises—demand even more careful planning. They’re big, they’re bulky, and their L-shape can either perfectly anchor a room or completely overwhelm it. The key is to measure the total footprint, not just one side.
Tape out the entire thing: the back length, the chaise length, and the overall depth. Pay very close attention to how far that chaise juts out. Is it going to block a doorway or make your favorite armchair impossible to access? And don’t forget the extras:
- Pull-out Sleeper: Just like a regular sofa bed, mark the floor space it needs when fully extended.
- Storage Chaise: Make sure the lid has enough clearance to open all the way without bumping into the wall or coffee table.
- Reclining Seats: If any part of the sectional reclines, you’ll need to leave several inches of breathing room behind it.
One of the biggest regrets I hear about sectionals is underestimating their visual weight. Even if the numbers say it fits, an oversized sectional can make a room feel suffocating. The painter’s tape method is your best defense—it forces you to see and feel the scale before you commit.
Once you’ve mapped everything out, you can get creative and find ways of optimizing unique spaces with smart storage solutions to complement your larger pieces.
Tackling Murphy Beds and Wall Beds
Murphy beds and cabinet beds are geniuses at saving floor space, but they have their own set of rules. The ceiling height you measured earlier is your first hurdle. You need enough clearance not just for the cabinet itself, but for the actual installation process.
Next, you have to nail the projection—that’s how far the bed sticks out into the room when it’s down. Mark this measurement on your floor. You need to be 100% sure the open bed won’t collide with your nightstand or ceiling fan.
Also, check what’s on the wall itself. The wall you mount a wallbed to has to be clear of light switches, outlets, or thermostats. While cabinet beds are freestanding, you still need to make sure the unit won’t block an outlet you need to use. To make things easier, you can cross-reference your numbers with detailed sizing charts, which often list the specific clearances required.
By taking the time to visualize your layout with these simple techniques, you’re turning a list of measurements into a smart, functional plan. You’ll be able to shop with total confidence, knowing your new furniture will not only fit through the door but will make your room better for years to come.
Common Questions When Measuring a Room
Even with the best plan, you’ll probably hit a few head-scratchers when measuring a room. What do you do with that awkward L-shaped living room? How much space do you actually need to walk around without bumping into things? Let’s get into the most common questions that come up.
Think of this as insider advice from people who’ve seen all the common (and costly) mistakes. We’ll cover them here so you can avoid them and shop for your furniture with total confidence.
How Do I Handle an L-Shaped or Irregular Room?
Very few rooms are perfect squares. An L-shape or a strange nook can feel impossible to measure correctly, but there’s a trick to it. Stop seeing it as one big, complicated space. Instead, break it down into smaller, simpler rectangles.
Picture your L-shaped room as two distinct pieces: a main rectangular area and a smaller rectangular offshoot. Just measure the length and width of each rectangle separately. When it’s time to plan your layout, you can think of them as different zones—maybe one for the main seating area and the other for a reading corner or a small desk.
This strategy works for any quirky room shape. Just sketch out the room and divide it into basic squares or rectangles, measure each one, and pop those dimensions onto your floor plan. It not only makes measuring a breeze but also helps you see how different parts of the room can serve different functions.
What Is the Standard Clearance for Walkways?
This is where so many people go wrong. One of the biggest mistakes is not leaving enough “breathing room” around furniture. A room that’s too crowded just feels stressful and is a pain to navigate. You want to create pathways that feel natural and easy.
As a solid rule of thumb, always aim for 30 to 36 inches of clearance for your main walkways. These are the high-traffic routes people will use to get in, out, and through the room. For tighter spots, like the gap between a sofa and a coffee table, 18 inches is the absolute bare minimum.
Anything less and you’ll find yourself doing that awkward side-shuffle to get by. A great pro tip is to use painter’s tape on the floor to mark out your planned furniture and walkways. It’s a simple visual check that will instantly tell you if the room will feel open and functional or just plain cramped.
Can I Trust the Dimensions on a Product Page?
That’s a great question, and the honest answer is… mostly, but you should always double-check. Good retailers try their best to provide accurate numbers, but small differences can pop up during manufacturing. A sofa listed as 84 inches wide might actually be 84.5 inches once it arrives—a tiny discrepancy that can become a massive headache in a tight spot.
Here’s our best advice:
- Dig for spec sheets: Look for detailed specification sheets on the product page. They often provide more than one measurement, like the frame height versus the total cushion height.
- Scan customer reviews: Real-world buyers are quick to mention if a piece turned out to be bigger or smaller than they expected.
- Give yourself a buffer: This is the most important one. Always leave yourself an inch or two of wiggle room. Never, ever plan for a piece that fits with zero space to spare.
Think of the listed dimensions as your starting point, not the final word. That little bit of buffer is the best insurance you can have against a nasty surprise on delivery day.
At Futonland, we specialize in furniture that fits real-life spaces, big and small. Explore our collection of convertible futons, sectional sleepers, and smart storage solutions designed for modern living at https://futonland.com.